Creating an Asset
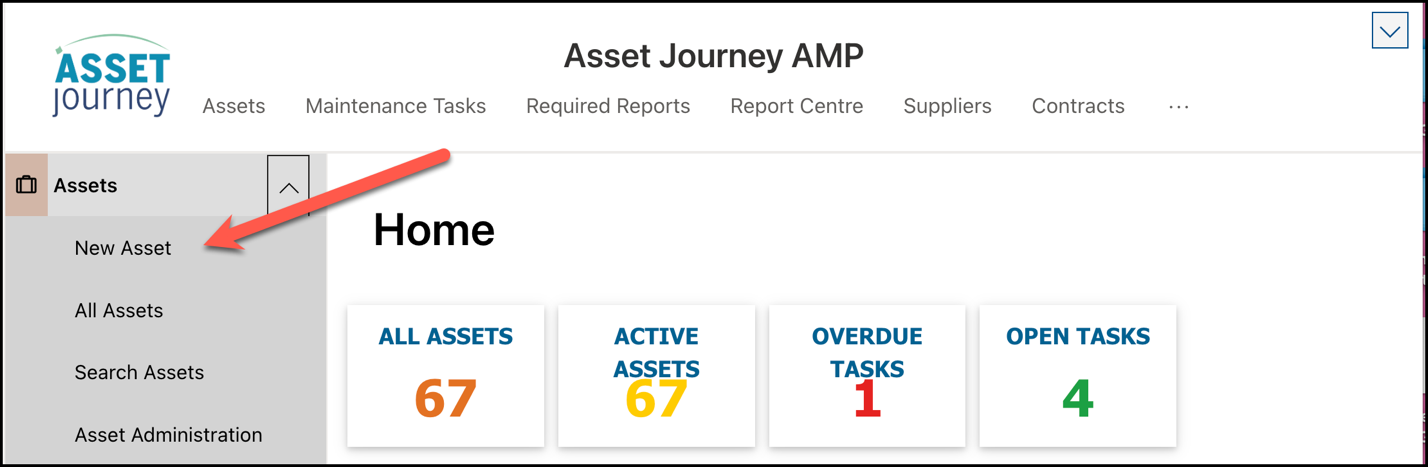
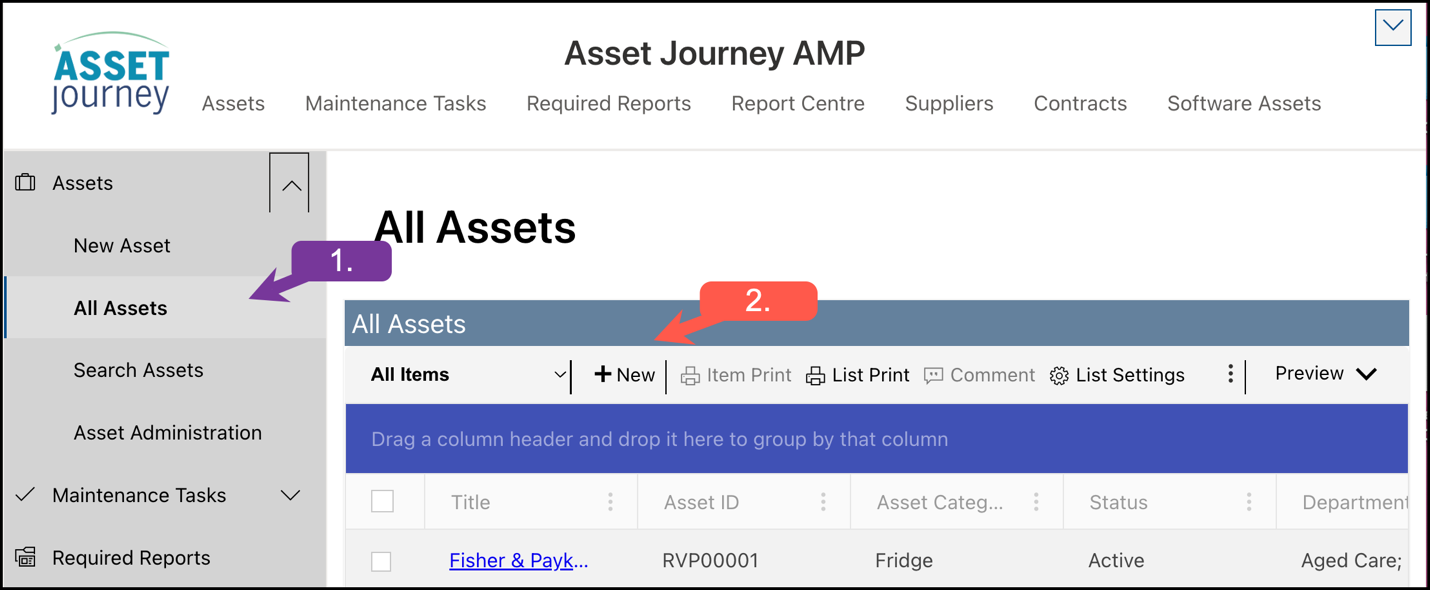
There are a few places where you can add an asset in Asset Journey. First, you can go to the left-side navigation bar and click “New Asset” button under “Assets” tab, as shown below. You can also go to the “All Assets” tab and click the “+ New” button to add an asset.
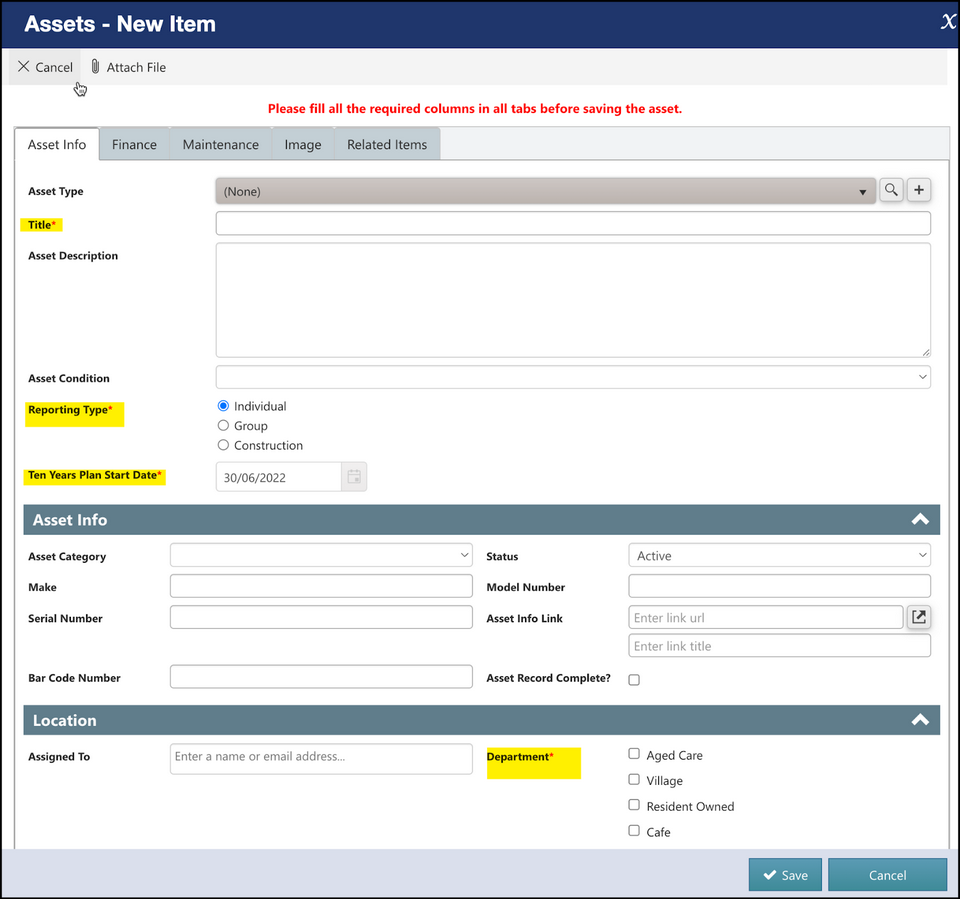
On the Asset Form itself, the required columns are as follows:
Title - Title of the asset.
Asset Type - choose an existing one or add a new Asset Type
Make, model, serial number - required by the legislation
Reporting Type
Group - To be utilised for assets that are bought in the same financial year and have a similar effective life, and each item in the group costs more than $1,000
Individual - Used when you want to see assets individually on the reports.
Construction - Used for Construction items such as Sewer Systems, Roads, Buildings, etc.
Ten Years Plan Start Date - Start date of your ten years plan
Department - Fill in department where the asset belongs.
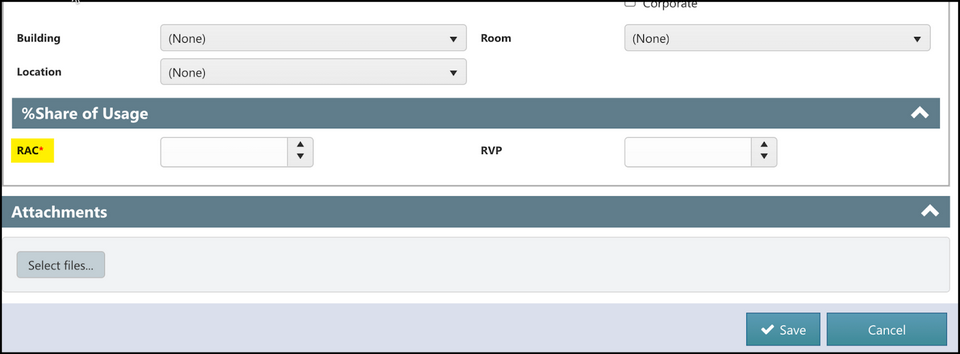
RAC and RVP - These columns must add up to 100%. These percentages will divide the costs of the Preventative Maintenance and Reactive Maintenance among your designated village department (RVP) and the other department(s) (RAC) that may share the asset. If the asset is not shared, 100% of the cost will be attributed to the RVP column.